

If you’re new to the Raspberry Pi world, you may be asking how to enable the Plasma Desktop. It’s your foray into personalizing your device, creating a highly aesthetic yet functional interface.
Trust me, I’ve been there, learning how to use each little step, which when combined unlock a world of possibilities. Follow our guide to quickly and easily have Plasma Desktop up and running on your Raspberry Pi.
If you’re building amazing projects or just getting started, you’ll discover the detailed guides you need right here!
Understanding Raspberry Pi Desktop Environments

As you jump into Raspberry Pi from whatever computing world you’re coming from, desktop environments are key to the first impression. These environments are more than pretty windows. They’re an essential part of how well your Raspberry Pi runs, particularly under constrained resources.
There are many different desktop environments, each with different qualities and resource usage. Let’s take a look at some of these environments, specifically how they handle Raspberry Pi’s sparse hardware.
XFCE is one of the most popular lightweight desktop environments. It provides a clean and simple interface that is less intensive on the system resources. That’s what makes it the perfect environment for those who love speed and simplicity.
Additionally, while GNOME is arguably the most polished looking DE, it definitely requires more resources. Here’s where it gets tricky. Though it’s beloved by some who like a modern desktop experience, it can be very demanding on a Raspberry Pi.
KDE Plasma, on the other hand, has a happy medium between beauty and practicality. It’s lightweight enough to run on Raspberry Pi, but still beautiful and extremely customizable. Ultimately, the best desktop environment to use will be determined by what the user needs and what the hardware can handle.
For example, if you are the type of user who desires a Windows-like desktop interface, then KDE Plasma would probably be your best option. If you’re looking for the best possible performance, XFCE might be the choice for you. It’s really just a matter of matching what you want with what your Raspberry Pi will be able to do comfortably.
What is Raspberry Pi OS?
Raspberry Pi OS, previously called Raspbian, is the official operating system for Raspberry Pi devices, customized to take full advantage of the hardware. It comes in two main versions: Lite and Full. The Lite version is intentionally minimalistic, saving resources by not including any graphical applications.
On the other hand, the Full version features a more extensive selection of applications for a richer experience. Raspberry Pi OS is designed to be easy to use, for beginners and power users alike. It comes with a set of tools and applications that make it easy to start projects or manage system settings.
If you’re a beginner looking to get started, Raspberry Pi OS has got your back. For the professionals looking for a stable platform, it still provides a strong base to build and experiment upon.
Exploring Different Desktop Environments
Here's a table to help compare popular Raspberry Pi desktop environments:
| Desktop Environment | Installation Complexity | Resource Usage | Key Features |
|---|---|---|---|
| XFCE | Simple | Low | Lightweight, efficient |
| GNOME | Moderate | High | Modern, feature-rich |
| KDE Plasma | Moderate | Moderate | Customizable, Windows-like |
Each environment comes with its advantages and disadvantages. Where XFCE is all about saving your power and resources, GNOME provides a more feature-rich experience, but uses more resources to do so.
KDE Plasma is the perfect compromise, giving you the customization without the bloat. Of course specific use cases drive decisions too. For instance, XFCE suits educational projects due to its speed, GNOME fits digital art creation with its comprehensive toolset, and KDE Plasma is great for general usage with its balanced features.
Benefits of KDE Plasma on Raspberry Pi
KDE Plasma’s lightweight nature is one of the reasons it’s one of the best desktop environments for Raspberry Pi. Its highly customizable interface lets users create the experience they want, making it easy to use for anyone familiar with Windows.
Productivity KDE applications bring a wealth of productivity-boosting applications with them, giving you everything you need, running lightning fast on Raspberry Pi.
Preparing for Plasma Desktop Installation

Getting started with installing the Plasma desktop on your Raspberry Pi takes a little preparation. This process transforms your Raspberry Pi into a powerful, customizable computing platform with KDE Plasma, acclaimed by over 80% of users for its rich features and adaptability.
Here’s what you need to do to prepare before moving on to the actual installation process.
Gather Necessary Equipment
Before diving into the software aspects, it's crucial to have the right hardware ready.
- At least 16GB for ample storage and performance.
- A reliable 5V, 2.5A power supply to ensure stability.
- Raspberry Pi Model: A Raspberry Pi 3 or newer is recommended for optimal performance with KDE Plasma.
- A USB keyboard and mouse are essential for setup. A monitor with HDMI input completes the basics.
Optional accessories such as a USB hub or mobile computing case can further expand your options. These accessories add even more convenience and protection to your Plasma Desktop experience.
Update Raspberry Pi OS
After making sure your hardware is ready, updating Raspberry Pi OS is the second most important step. This is important for security, as well as compatibility with the latest and greatest software.
Begin by opening the terminal and executing the following commands:
Bashsudo apt-get updatesudo apt-get upgrade
These commands are used to update your package indexes and upgrade installed packages. As always, it’s important to keep your OS up-to-date. Doing so not only fortifies your security, but increases your overall compatibility with the latest software.
Install Required Software Packages
Now that we have updated the OS, we can install the required software packages to install KDE Plasma. Package installation does need a fairly stable internet connection to download packages in a timely fashion.
Make sure you have the right privileges by running commands with sudo. Here’s a checklist of essential packages:
- Plasma Desktop Environment
- SDDM (Simple Desktop Display Manager)
Open the terminal and run:
Bashsudo apt install kde-plasma-desktop
Selecting SDDM here is a good call for KDE, giving you a smooth, attractive initial login screen. Be ready to manage other dependencies by accepting them when installing.
That way, when the time is right, you’ll be ready for a smooth, easy transition to your new desktop environment.
Due to the changes being applied, a system reboot is required immediately after installation. When you reboot, be sure to select KDE as your session type.
Choose an X11 session when asked, and enjoy the beauty of the Plasma desktop in all its colorful splendor.
Step-by-Step Guide to Install Plasma Desktop

Installing the Plasma Desktop on a Raspberry Pi may seem daunting at first. It does make for a visually stunning environment that really makes your mini-computer feel alive. The Raspberry Pi, a highly versatile and cost-effective single board computer, operates on various Linux-based operating systems, including Raspberry Pi OS.
Another one of the popular desktop environments available to install is KDE Plasma, famous for its beauty and customizability. So let’s take a step-by-step look at getting it all set up.
1. Access Raspberry Pi Terminal
The first part of this adventure begins with getting to the Raspberry Pi terminal. This is where all that magic gets made. If you’re just joining us, we’re glad you found us!
The terminal, or command line, is a powerful interface that allows you to interact directly with the Raspberry Pi’s operating system. Open the terminal by clicking the terminal icon in the taskbar to open a terminal window.
Alternatively, you can press Ctrl + Alt + T to launch a terminal with that keyboard shortcut. Without the terminal, configuring and managing your new Raspberry Pi would be a daunting task. They give you the power to install additional software, update the entire operating system, and do so much more.
2. Install KDE Plasma Packages
Now that you have the terminal open, you’re ready to install the KDE Plasma packages. To do this, you should execute the command: sudo apt install plasma-desktop. This command downloads all the required components to install the Plasma desktop.
If you're interested in the complete KDE suite, including additional applications, you can opt for: sudo apt install kde-full. Keep in mind that KDE Plasma consumes more system resources than lighter desktop environments such as LXDE and XFCE.
It’s pretty straightforward to install LXDE alongside KDE with the command sudo apt install lxde or install XFCE with sudo apt install xfce4. The typical user, 80% of them, will install kde-standard. This package installs some important software by default, but it installs quite a few programs you won’t need.
Once installed, make sure to run sudo apt update to refresh your package list. Then run sudo apt upgrade to make sure everything is shipshape.
3. Configure Boot Settings
Setting boot options properly is essential to enjoying your KDE Plasma desktop. This last step makes sure that your Raspberry Pi will work perfectly every time you turn it on.
This means that you will have to manually edit the configuration file to define your desired display manager. Run sudo dpkg-reconfigure lightdm to choose the display manager.
Ensure you double-check things like GPU memory allocation and display resolution in the raspi-config utility. These settings make it a very smooth experience. If you misconfigure it, you could have a corrupted display or your system may not boot up at all.
4. Reboot and Access Plasma Desktop
After this, you’ll need to reboot your Raspberry Pi. Just enter sudo reboot in the terminal. Now, when your Raspberry Pi restarts, you’ll be able to log in to your new Plasma desktop.
Here is where it gets fun though! So take the time to familiarize yourself with the unique features and extensive customization options that come with KDE Plasma. Customize your desktop and try out new applications! KDE Plasma offers a beautiful and dynamic desktop environment.
Configuring and Customizing Plasma Desktop
Going from a more restrictive world of Raspberry Pi with the Plasma Desktop can honestly be like a breath of fresh air. Plasma Desktop has a beautiful design that dazzles the senses. Plasma Desktop is known for its deep and flexible customization possibilities, giving users the tools to create their ideal digital workspace.
The depth of Plasma’s customization is indeed mind-blowing. They provide a wondrous playground for those determined to shape their own unique experience.
- Themes and Colors: Alter the look with various themes and color schemes.
- Icons and Fonts: Choose from a selection of icon packs and font styles.
- Desktop Layouts: Adjust panel placements and widget arrangements to suit your workflow.
- Window Management: Customize window behavior and appearance.
- Notifications: Set preferences for how and when notifications appear.
At the same time, urging users to play around with new themes and layouts can create a more fun and personalized workspace. The possibilities are nearly endless, and Plasma Desktop encourages users to experiment and discover what truly works best for them.
Customize Appearance and Themes
Customizing the look and feel on Plasma Desktop is easy, flexible, and enjoyable. The best way to find out is to try! You can begin by launching the System Settings, going to the “Appearance” section.
Here, users can download and customize an immense library of themes and icons. Even something as simple as choosing a popular theme such as “Breeze” or “Oxygen” can completely change the visual vibe of your desktop. Icon packs such as “Papirus” can give a distinct flavorful touch.
To get started, select a theme to build out your personalized Plasma experience. Finally, navigate to the "Look and Feel" category and save your customization. That makes it really easy to go back to your previous setup at any time.
Manage Applications and Widgets
Adding and managing applications and widgets is just as easy. For example, you can right-click on the desktop and select “Add Widgets.” From here, you can start drag and dropping widgets, or what we call plasmoids, such as a clock, weather forecast, or system monitor directly onto your desktop.
Widgets such as “Notes” or “Calculator” increase productivity. Since you use Plasma primarily through applications, for applications, the application launcher is your gateway.
Explore by category or search to find your new favorite software. Adding your most-used apps to the panel gives you faster access and makes your workflow more efficient.
Adjust System Settings for Performance
Optimizing your system’s settings can make a huge difference in how smoothly your Plasma Desktop runs. You may want to go into the "Desktop Effects" area and disable some of the extra effects and animations to speed things up and improve performance.
Tinkering with the compositor settings goes a long way too in reducing the resources used. Monitoring tools such as “KSysGuard” are a game changer for keeping tabs on your system performance.
They give you practical guidance on CPU and memory usage that help you troubleshoot and rectify any potential bottlenecks.
Troubleshooting Common Installation Issues
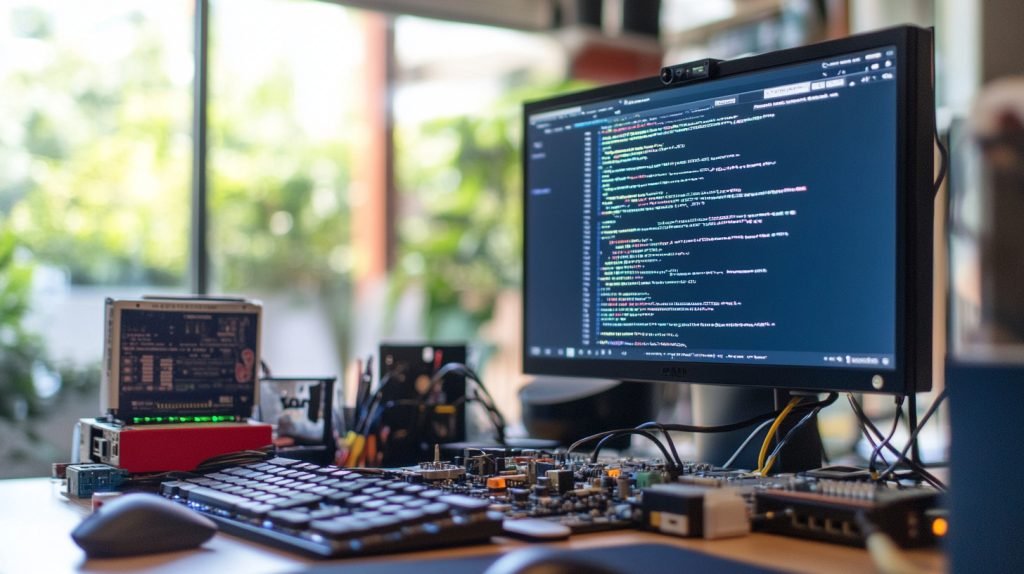
Installing and configuring Plasma Desktop on Raspberry Pi can be intimidating. You may run into a few roadblocks along the way. Here’s a look at some of the most common issues you’ll face. Here’s a few of the most common, and how I recommend you get through them. Find out how recording your troubleshooting process can spare you a major migraine down the road.
Resolve Booting Problems
The very first problem you’ll run into is boot issues. If your Raspberry Pi isn’t booting, test your displays. If only one monitor comes on and the other remains blank, the booting procedure might be responsible.
Begin by inspecting your boot configuration files for any syntax errors or misconfigurations. Sometimes a single misplaced line or incorrect setting can create headaches. If your Pi still won’t boot, try recovery mode.
This mode will allow you to access the system files and make the required adjustments without booting into the desktop environment. From my experience, re-installing Debian Linux with KDE Plasma as the sole desktop environment did not resolve the glitches. In reality, it actually served to compound them. So be careful with new installs.
Fix Display or Resolution Issues
After you get through the booting phase, display settings can be a pain point. If your screen’s resolution is incorrect or not displaying properly, click here! Change the configuration from within the KDE Plasma session to resolve the problem.
Open your display settings and adjust your resolution and refresh rate for the best possible visuals. Updating your drivers is important, and checking your hardware connections is just as important. A loose cable is the simple fix you weren’t expecting.
Pulling in the official NVIDIA drivers through Debian’s "contrib"-enabled APT ensures a rock-solid installation and performance. This is critical, particularly for high-end video encoding projects that maximum out your system.
Address Wi-Fi Connection Problems
Wi-Fi connectivity is yet another place where complications can rear their heads. Verify that your network connection is working. Next, make sure the SSID is correct, then ensure you are entering the password (if applicable) correctly.
Command-line utilities such as iwconfig and ifconfig are priceless when it comes to troubleshooting and fixing connectivity issues. These tools give you real-time visibility into the performance of your network, enabling you to identify and troubleshoot problems faster and more accurately.
I often go back and forth between “X11” and “Wayland” sessions depending on what I’m working on. Nonetheless, I continue to use “X11” for the sake of consistency.
Keeping a log of your troubleshooting process may feel like a chore, but it’s massively helpful. Keeping notes on steps taken, changes made, and outcomes achieved provides a valuable reference for future issues and can streamline problem-solving.
Optimizing Plasma Desktop Performance

Taming the Plasma desktop performance on a Raspberry Pi can be like breaking in a wild bronco. It’s one thing to install it, another to get it running smoothly. Here are some actionable tactics to improve performance.
Free Up System Resources
Purging the junk, as they say, is step one. Begin by seeking out and eliminating the resource-hogging apps and services. As I scanned my Raspberry Pi, I found many default applications that were idly wasting memory. Uninstall these resource-hungry applications and use lightweight alternatives.
For instance, replace that heavyweight office suite with a simpler text editor and experience a whole new level of system snappiness. Instead of using a resource-hog such as a full-featured web browser, go with a lightweight alternative like Midori. The difference is stunning and immediate.
Eliminating other tasks your Raspberry Pi is trying to do will free up valuable resources and make Plasma’s sluggishness less apparent.
Optimize Startup Applications
Startup application management is like clearing off your desk so you can concentrate and be more productive. Controlling startup applications can make a huge difference in boot times and your computer’s overall performance.
Open the “Session and Startup” settings from within the Plasma desktop environment. Here’s where you’ll find a list. You can reorder these applications that automatically start when you boot up. Turning off non-essential apps such as Bluetooth services, if you’re not using them, will result in faster boot times.
Recommended applications to disable at startup include:
- Bluetooth Manager
- Print Services
- Auto-updaters
These little adjustments, combined, are enough to make a big difference, creating a more responsive feel to the system right from the start.
Enhance Graphics Performance
Visual performance while using Plasma on a Raspberry Pi is one heck of a roadblock. The ARM version of Plasma is quite different from its x86 counterpart, trading some performance to optimize for battery life. Getting the appropriate drivers and settings can create a world of difference.
If you want even better responsiveness, you’ll have to go a bit deeper into command line territory. Utilize these qdbus commands to disable compositing. Finding the right configuration to fit your needs can be trial and error.
Optimize your settings. Reduce settings such as display resolution, or turn off effects you don’t use or need. These small changes have a huge impact on our ability to strike a balance between visual quality and performance.
Conclusion
Enabling the Plasma Desktop on your Raspberry Pi unlocks a new realm of creativity and productivity. It’s a pretty simple process, with decent documentation, clear steps, and plenty of how-to-guides to get you going. With a bit of know-how and planning, you can turn your Raspberry Pi into a robust and attractive desktop environment. Creating a custom Plasma Desktop has the added benefit of making your environment feel more personal, more home, more you. With a little troubleshooting and optimizing to make sure everything is working properly, you’ll get to experience everything your Raspberry Pi is really capable of. So dive in, explore, and enjoy all that this flexible desktop experience has to offer. Don’t forget that the community is here to help and share knowledge. Want to get more from your Raspberry Pi? Begin your adventure with Plasma now!
Frequently Asked Questions
What is Plasma Desktop on Raspberry Pi?
Plasma Desktop is a beautiful, colorful, feature-rich interface that makes the Raspberry Pi really shine. It features a sleek, contemporary interface and rich features, increasing your productivity and delight.
Why choose Plasma Desktop over other environments?
With Plasma Desktop you’ll get an extremely customizable and beautiful environment. It’s great performance, combined with a wide range of features, makes it the perfect choice for users that appreciate the freedom of customization and visual flair.
What are the hardware requirements for installing Plasma Desktop?
A Raspberry Pi 3 or newer is highly recommended. Make sure you have at least 2GB of RAM for best experience! You’ll need a power supply you can trust and a microSD card that has at least 16GB of storage.
How do I prepare my Raspberry Pi for Plasma Desktop installation?
Keep your Raspberry Pi’s operating system fresh and updated. Clear some storage space, and backup any important data that you can’t afford to lose in case you lose anything in the installation process.
How can I optimize Plasma Desktop performance on my Raspberry Pi?
Turn off startup programs and services you don’t need. Optimize performance settings through Plasma Desktop and stay ahead of the game by regularly updating your system to improve overall speed and efficiency.
What should I do if I encounter issues during installation?
First, make sure you’re connected to the internet and that power is supplied to your device. Go through each installation step with care. Check Raspberry Pi & Plasma Desktop communities for more specific troubleshooting advice.
Can I revert to the previous desktop environment after installing Plasma Desktop?
Don’t worry, you can always go back. Go to system settings to switch your desktop environment. Always make sure to read instructions carefully and back up your devices before attempting any changes to prevent data loss.


Leave A Comment