

Key Takeaways
-
Raspberry Pi offers a cost-effective and highly customizable solution for monitoring your network. It makes it easy for users to see and understand network performance. Built-in WiFi and Ethernet ports make it even more powerful, as it can take on different network tasks.
-
It allows you to monitor dozens of devices and traffic trends simultaneously and provides real-time alerts for any network threats.
-
Real-time monitoring and analysis of network traffic using free tools such as Wireshark and IPTraf can help reveal suspicious traffic patterns and network bottlenecks. Keeping a close eye on bandwidth usage, packet loss, and latency is important for keeping your network resources running as efficiently as possible.
-
Quality of Service (QoS) metrics such as jitter, latency, and packet loss are necessary to ensure service quality. Using Raspberry Pi to track these metrics over time can help ensure your network continues to perform as needed.
-
DNS and firewall monitoring are essential components of maintaining trust in domain name resolution and identifying security risks. Tools such as iptables are critical in maintaining firewall rules and monitoring network traffic.
-
Before you can use your Raspberry Pi for network monitoring, you need to set it up. Next, plug it into the network and physically secure the device to protect it. Creating a process, facilitating ongoing maintenance, and keeping it fresh leads to solid, dependable monitoring.
Implementing a Raspberry Pi as a network monitor provides a simple yet effective way to manage and monitor your network activity. This tiny, pocket-sized network troubleshooter offers real-time visibility into your data flow, keeping your network running at peak performance.
Raspberry Pi continues the accessibility theme by providing an extremely affordable platform for hobbyists and professionals alike. It connects high-impact network management with easy-to-use technology.
This methodology demystifies the process of network supervision, allowing a wider range of citizens and stakeholders to engage with it.
What is Raspberry Pi Monitoring
Raspberry Pi monitoring is an excellent solution for foot patrolling a network. Powered by a Raspberry Pi device, this simple process utilizes a Raspberry Pi network monitor to analyze and help you understand how your network is performing and behaving. First, it takes a big advantage of the computing power of Raspberry Pi.
These tiny but powerful computers have quickly become a favorite for DIY tech projects. They’re capable of monitoring network-wide traffic, identifying slowdowns, and finding out where the network is potentially failing. This is hugely advantageous to anyone looking to maintain optimal network performance. It enables them to reach just a little more without putting them through the burden or expense.
The recent Raspberry Pi models, especially those that come with integrated built-in WiFi and Ethernet ports, add even more appeal to network monitoring. These features make for more seamless connectivity and help to make sure that the Pi can interface easily with your network.
With the Raspberry Pi 4 you’ll find a seriously powerful board with up to 8GB RAM. It hands multiple monitoring jobs at the same time with no problem! This model really opens the door for you to deploy some really heavyweight monitoring applications.
In the background, it offers valuable diagnostic information about the state of your network. Whether your needs require a small home network or a big office setup, it can be used as such. It will be wildly flexible to suit your purposes!
When it comes time to troubleshoot connectivity issues and locate network bottlenecks, actively monitoring a network is key to ensuring a fast, reliable network. When you’re monitoring with Raspberry Pi, spotting problems before they become serious is a cinch.
This involves more process issues like slow download speeds and dropped connections. This is very handy for anyone employing Raspberry Pi as a network monitor. It allows us to monitor internet connection statistics over the course of a day, a week, or even indefinitely!
Installing it is just about as simple as deploying any other Linux-based device. Even those new to network monitoring will be up and running in no time!
The versatility of the Raspberry Pi comes into play as a highly cost-effective solution for many different network monitoring tasks. Its low cost allows it to be deployed across a wider area without a negative financial effect.
To have a great experience using Monitoring Agents on your Raspberry Pi, we recommend you use Obkio’s network monitoring solution. Even better, it enables you to share synthetic traffic seamlessly.
This configuration passively monitors network performance, detecting problems in real-time without packet capture. Adding new devices to your network monitor is just as simple. In this manner, you are able to monitor all vital devices and maintain a concise view of your network’s health.
Purpose of Using Raspberry Pi
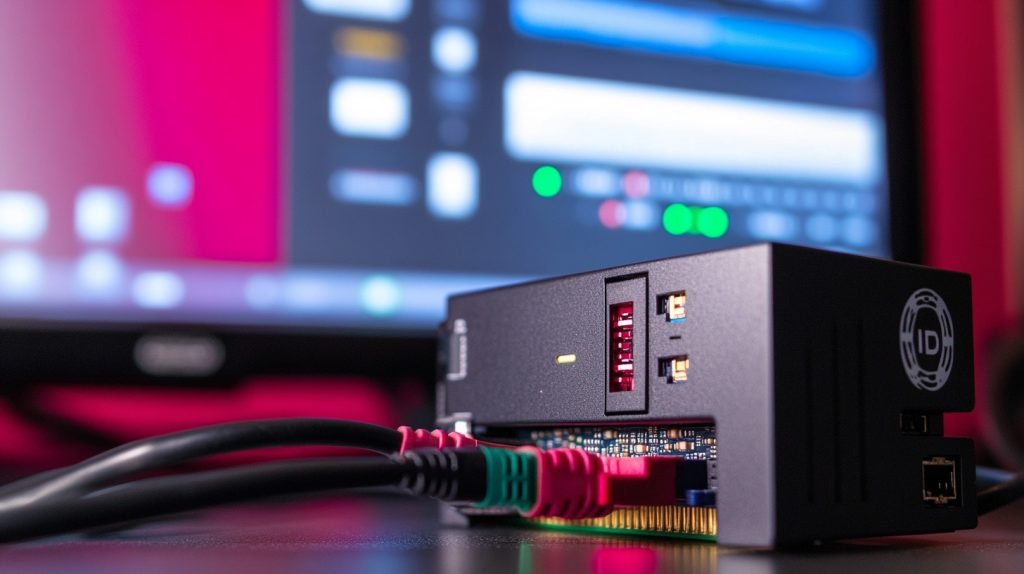
The main purpose of using a Raspberry Pi for network monitoring is to provide the best in performance all over your network. This is where the Raspberry Pi truly shines, handling complex traffic patterns and dozens of network-enabled devices simultaneously. Its versatility in doing so makes it an invaluable resource for keeping network functions at peak performance.
This compact yet mighty device serves as a specialized network monitor. It’s an elegant replacement for more costly and complicated solutions. It alerts and notifies you in real-time about network incidents and performance degradation. All of which help to make sure your network is healthy and running smoothly.
Network Traffic Analysis
Analyzing network traffic is key to finding abnormal spikes or bottlenecks that can slow down performance. Raspberry Pi is powerful enough to use PocketSphinx for nuanced and sophisticated voice recognition. Providing this level of analysis is critical to understanding the flow of data in order to most efficiently optimize network resources.
The most important metrics to keep an eye on are bandwidth consumption, packet loss, and latency. Keeping a close eye on these metrics will help you identify areas of inefficiency and make course corrections quickly. With the Raspberry Pi's real-time monitoring integrated, it becomes an invaluable asset to network administrators looking to manage traffic efficiently.
Quality of Service Metrics
Measuring and monitoring Quality of Service (QoS) metrics has always been important in delivering a quality network service. These metrics—like jitter, latency, and packet loss—offer a window into the health of a network’s efficiency and reliability. Raspberry Pi is useful in tracking all these over time, and it provides the historical context that allows for much more efficient network management.
Common QoS metrics to keep an eye on include:
-
Jitter
-
Latency
-
Packet Loss
This dynamic duo brings you innovative visual traceroute capabilities so you can pinpoint and address network problems in record time, optimizing performance and minimizing costly downtime.
DNS and Firewall Monitoring
We find that DNS monitoring is an essential component of keeping domain name resolution reliable. Firewall monitoring is an important step in detecting security threats and stopping unauthorized access attempts. The Raspberry Pi can handle all of these tasks without breaking a sweat using tools such as iptables to control firewall rules and inspect traffic.
Key aspects of monitoring in DNS and firewall settings include:
-
Blocked requests
-
Response times
Setting Up Raspberry Pi for Monitoring
Setting up a Raspberry Pi network monitor for tracking network performance is an affordable, hands-on approach to understanding and improving your network’s performance. This process includes many important steps and considerations to ensure the whole system operates effectively.
1. Gather Necessary Components
First, you’ll want to get all the components you’ll need for your Raspberry Pi setup. The essential components include:
-
Raspberry Pi board (A Model 4 works best at full performance)
-
Power adapter (5V/3A for Raspberry Pi 4)
-
MicroSD card (at least 16GB, Class 10)
-
Network cables (Ethernet cables for wired connections)
For enhanced monitoring capabilities, consider optional accessories like:
-
Heat sinks for better heat dissipation
-
A protective case to prevent physical damage
Making sure your components are compatible with each other is key. Finding the right combination means smooth operation and avoiding complications that can come from using incompatible components.
2. Install Operating System
To set up the Raspberry Pi OS on your microSD card, pay special attention to the instructions below. To begin, you’ll need to download and set up the Raspberry Pi Imager tool. Use it to create the OS image on your microSD card.
Choosing the proper release of the OS is key if you want to monitor your network. For this, Raspberry Pi OS Lite is suggested because of its light weight and low consumption of resources.
Here’s a list of necessary installation tools:
-
Raspberry Pi Imager
-
A computer with an SD card reader
Keeping the operating system up to date helps improve the security and performance of the Raspberry Pi. Frequent updates are key to staying a step ahead of vulnerabilities.
3. Connect to Network
Connecting your Raspberry Pi to a local network can be done through WiFi or Ethernet. Once again, a reliable internet connection would make our monitoring efforts much more feasible.
If you run into connectivity issues, try these tips:
-
Ensure that WiFi credentials are entered correctly
-
Check Ethernet cable connections
-
Reboot the router and Raspberry Pi
It’s easier and less error-prone to manage the Raspberry Pi if you always use a static IP address.
4. Update System Packages
Keeping your system packages up to date is a good habit that guarantees you’ll always have the latest features and security patches. Use commands like sudo apt update and sudo apt upgrade to ensure everything is up-to-date.
Providing these updates might seem like a mundane task, but it’s essential in ensuring the reliability of network monitoring tools such as Net-SNMP and Zeek.
5. Secure the Raspberry Pi
Securing your Raspberry Pi should be your number one priority to prevent any unauthorized access. Begin with updating default passwords and setting UFW to ensure firewall settings.
Consider these additional security measures:
-
Disable SSH root login
-
Use VPNs for added security
Conduct security audits regularly to find and eliminate vulnerabilities before they can be exploited.
Installing Network Monitoring Tools
Configuring your Raspberry Pi to monitor your network starts with choosing the appropriate tools for your unique requirements. With its dual Gigabit Ethernet ports, the Raspberry Pi 4 is perfect for this.
First up, prepare your installation of Raspbian. This Debian-based Linux distribution for the Raspberry Pi provides a rock-solid base for all of your monitoring hardware. Tools such as Ntop, Darkstat, and Wireshark provide varying capabilities. Choosing the appropriate tools depends on your network’s needs and the Pi’s processing power.
Popular Network Monitoring Tools
-
Offers comprehensive network traffic analysis, providing insights into bandwidth usage, network health, and more.
-
Darkstar: Focuses on real-time traffic statistics and visualizations, making it easy to monitor network performance.
-
Wireshark: Captures and analyzes network traffic in real time, allowing you to identify and resolve issues quickly.
Open-source tools provide the power, flexibility, and customization you’ve always craved. With these tools at your disposal, you can customize your monitoring solutions to meet your needs.
The flexibility of open-source software means you can change and improve functionalities to keep up with the changes in your network.
Ntop Setup Process
For installing Ntop on the Raspberry Pi, follow these steps:
-
First, make sure your machine is up to date with
sudo apt-get updatefollowed bysudo apt-get upgrade. -
We will install ntop so we will use the command
sudo apt-get install ntopngto install it. -
Once installed, you can configure Ntop through its web interface, which you can access by visiting your Pi’s IP address.
Ntop’s standout features are in-depth traffic analysis, protocol breakdown, and bandwidth monitoring. The tool's configuration options are extensive:
-
Traffic Filtering: Focus on specific network protocols or devices.
-
Alerting: Set up alerts for unusual traffic patterns.
-
Data Export: Export data for further analysis.
Reviewing Ntop's documentation is crucial for exploring advanced setup options and troubleshooting potential issues, ensuring you leverage its full capabilities.
Darkstat Installation Steps
To install Darkstat, consider these steps:
-
Update your Raspberry Pi with
sudo apt-get update. -
Install Darkstat using
sudo apt-get install darkstat. -
Run Darkstat with
sudo darkstat -i eth0, substitutingeth0with the network interface you want to monitor.
Real-time traffic statistics and easy-to-read visualizations from Darkstar can be important to driving time-sensitive decisions. Configuration settings enhance its performance:
-
Interface Selection: Specify the network interface to monitor.
-
Port Monitoring: Focus on specific ports for detailed insights.
-
Logging: Enable logging for historical data analysis.
Pair Darkstat with packet analyzers such as Wireshark for a 360-degree view of your network. This potent pair amps your performance management prowess and helps you proactively keep things running smoothly.
Wireshark needs the network interface set to promiscuous mode to listen for all traffic on the network segment and allow deep packet inspection.
To take things several steps further, installing Obkio’s software agent and two of their Public Monitoring Agents after watching their 10-minute tutorial can help you provide an impressive setup.
With real-time alerts and customizable notifications, Obkio makes it easy to address problems right away. In fact, 80% of network issues are solved in under 10 minutes after detection!
Configuring Network Monitoring Software
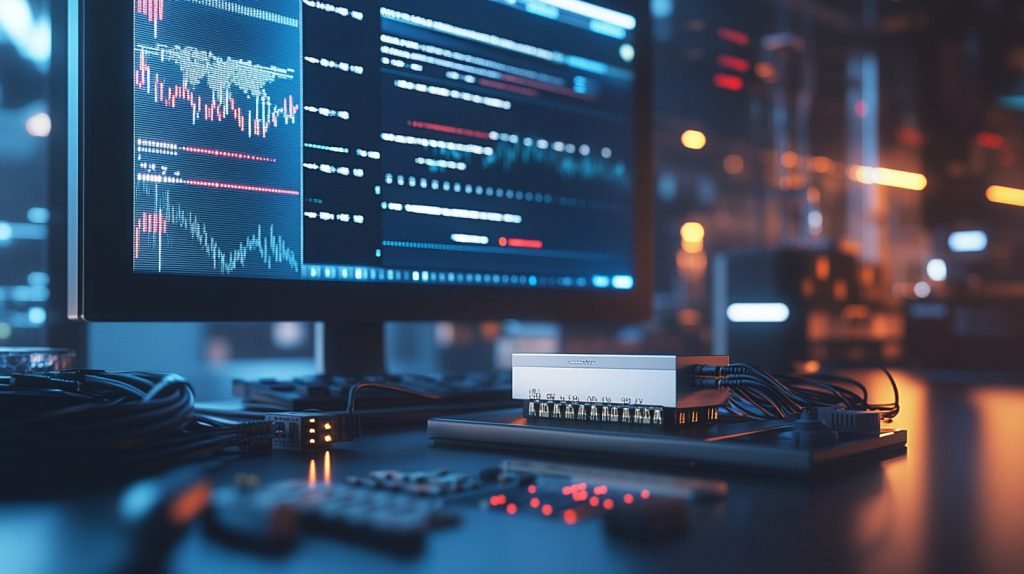
Properly configuring a Raspberry Pi network monitor is essential for capturing accurate data regarding your network's health. Doing so enables you to monitor the performance metrics of your network and catch potential threats or problems before they escalate. This step focuses on adjusting settings and parameters to align with unique monitoring requirements while ensuring that data collection is both comprehensive and precise.
Tools such as Ntop and Darkstat allow you to configure collections to track a multitude of network activities. It's crucial to understand these configuration options and their impact on data accuracy and monitoring effectiveness, especially when utilizing the Internet Pi for network traffic monitoring.
To configure Ntop and Darkstat properly, start by configuring the software. This will ensure that you can cater to the specific needs of your network. For Ntop, once installed, you could go through the user interface to adjust settings, such as how often it checks for updates and when it alerts you on updates.
Darkstar, for example, requires manual editing of a configuration file. Experiment with parameters such as refresh rates and data logging options to maximize its utility. While the steps may seem daunting, with a bit of patience, you can easily tailor either tool to fit your particular network environment seamlessly.
Configure Ntopng Settings
Configuring Ntopng settings is easy if you know what to do. First, load the Ntopng dashboard on your Raspberry Pi. You will want to establish user permissions, determining who has access to view and edit the data. Change update intervals to address the need for near-real-time data versus the burden on system resources.
Set alert thresholds so you can get alerts on suspicious or unexpected network behavior. Here's a quick list of key settings to consider:
-
Define who can access and alter network data.
-
Update Intervals: Set how often the software refreshes data.
-
Alert Thresholds: Specify conditions that trigger alerts.
Customizing Ntopng-specific dashboards allows for the most useful data to be presented. Tailor the visual display of metrics to highlight the most critical information for your network. This move will improve monitoring efficiency and improve the user experience.
Modify Darkstat Configuration
Adjusting Darkstat’s configuration is crucial for accurate monitoring. To configure Darkstat, you need to set its configuration file. This is a particularly delicate task, as even slightly off settings can mean data is reported incorrectly.
Configure parameters like refresh rates to regulate the frequency of data refreshes. Configure data logging settings to determine how much historical data you’d like to record. Common configuration changes might include:
-
Refresh Rates: Control data update frequency.
-
Data Logging: Define how much historical data to keep.
Continuously check and refine these settings as your network changes over time. This practice is critical for keeping your monitoring setup relevant and effective as the network evolution continues.
To take your Raspberry Pi monitoring even further, install Nagios or NEMS Linux for more robust solutions. Additional options beyond the PiHole over PiCockpit remote management include commercial solutions such as NetBeez that can provide automated alerts and other features.
Every tool featured here brings something special to the table to round out your network monitoring approach, creating a strong foundation to keep your network healthy.
Accessing Monitoring Dashboards
Accessing monitoring dashboards on your Raspberry Pi can completely change the way you monitor network activities. Now, let’s take a closer look at accessing Ntop and Darkstat dashboards, which are essential for proactive monitoring.
Having your Raspberry Pi monitor your internet traffic is only one possibility. Coupled together, these tools and resources will give you a powerful, unobstructed view of how your network is performing. You can view your internet connection history by the last day, week, or even further back.
The Prometheus/Grafana duo is a powerful, versatile combination that provides a great deal of flexibility to monitor your network traffic. Key metrics displayed on these dashboards include:
-
Traffic volume
-
Active connections
-
Bandwidth usage
-
Packet loss
-
Latency
Using dashboards allows you to get a quick overview of your network’s health so you can more easily spot problems at a glance. As an example, your Raspberry Pi, at least with the base 2GB model, is capable of speeds of 910 Mbits/sec. This stellar achievement gets two computers talking smoothly right through a physical switch.
Access Ntop Web Interface
Accessing the Ntop web interface is fairly simple. First things first—make sure your Raspberry Pi is connected to your network. Open up a browser and go to http://: This step-by-step approach simplifies the process:
-
Connect Raspberry Pi to the network.
-
Simply open a web browser on any device connected to the same network as the Solo.
-
Type in Raspberry Pi’s local IP address, followed by Ntop’s port number.
-
Log in using your credentials.
The Ntop user interface is full of powerful tools for graphically monitoring network activity. Key sections to explore include:
-
Traffic Graphs: Visual representation of data flow.
-
Alerts: Notifications for unusual activities.
-
Protocol Breakdown: Insight into data usage per protocol.
-
Top Talkers: Identification of devices using the most bandwidth.
The web interface is great for remote monitoring, letting you check up on your network from any location within your network’s reach.
Access Darkstat Web Interface
Darkstat provides real-time network traffic statistics via a web-based interface. To access it, follow these steps:
-
Ensure Darkstat service is running on your Raspberry Pi.
-
Open your preferred browser within the local network.
-
Enter the Raspberry Pi’s IP address and Darkstat’s port.
-
Access the dashboard for live data.
Darkstar offers colorful visualizations and interesting statistics for truly effective monitoring. Key features include:
-
Traffic Charts: Real-time data flow.
-
Bandwidth Usage: Detailed view of usage patterns.
-
Host Statistics: Information on connected devices.
-
Access Logs: Tracking of historical data.
The easy-to-use interface allows for fast access to roadway network data, turning potentially intimidating information into simple, digestible graphics.

Overview of Monitoring Solutions
If you’re looking into network monitoring solutions for Raspberry Pi, there are a number of tools available with specialized features designed to suit various requirements. Ntop, Darkstat, and Wireshark emerge as strong contenders, with each having advantages and niche use cases.
For example, Ntop offers a very full-featured web interface, making it a great option to use if you want to visualize your network traffic in real time. One of the primary advantages is its ability to monitor and classify bandwidth consumption by protocol. Ntop’s complexity can be daunting to newcomers.
Darkstar is a much lighter solution, prioritizing simplicity and easy installation. It monitors specific network traffic and provides very rich statistics through a friendly web interface. This tailored approach allows users who value simplicity and fast time to deployment to be well served.
On the negative side, its feature set is understandably more limited than others. Wireshark is probably best known as a packet sniffing, deep packet inspection tool. Where it really shines is in its ability to offer deep inspection and analysis of network packets, which is fantastic for troubleshooting and security investigations.
Given its complexity, it can be a bit intimidating for beginners getting started with network monitoring. Selecting a tool that fits your unique needs is the first and most critically important step. Finding the right fit can improve your monitoring efficiency exponentially.
To aid in selection, consider this comparison table:
|
Tool |
Features |
Installation Requirements |
Use Cases |
|---|---|---|---|
|
Ntop |
Real-time traffic analysis, bandwidth monitoring |
Requires web server setup |
Detailed network visualization |
|
Darkstar |
Simplicity, basic web interface |
Lightweight, minimal setup |
Basic traffic statistics |
|
Wireshark |
Packet capture, deep analysis |
Requires graphical interface |
In-depth troubleshooting |
Choosing the best tool ultimately depends on determining your network’s unique monitoring requirements. Consider the scale of your network. In addition, think about the level of detail required and how familiar your team is with the tools as well.
Traffic Analysis Techniques
Traffic analysis is the process of applying different techniques to identify patterns and anomalies in network behavior. Packet capture and flow analysis are key techniques. Packet capture is the process of intercepting and logging packet data flowing over a network, giving you detailed visibility into what’s happening across your network.
Flow analysis combines details across data flows to provide a higher-level view of network traffic. Common traffic analysis methods include:
-
Deep Packet Inspection (DPI)
-
Flow Sampling
-
Anomaly Detection
-
Port Monitoring
By using several different techniques, you can get a complete view of network performance and focus on troubleshooting and optimization efforts where they’ll have the most impact.
Quality of Service Evaluation
You can’t mention network monitoring without talking about Quality of Service (QoS) evaluation. This process requires mapping user experience to the overall state of the network based on metrics such as latency and jitter. Focusing on these metrics helps you determine just how well your network is delivering the level of service users expect to experience.
Tools and methods for effective QoS evaluation include:
-
Bandwidth Monitoring Tools
-
Latency Testing Tools
-
Jitter Analysis Tools
-
Traffic Shaping Techniques
The biggest advantage of continuous QoS monitoring is the ability to uphold superior quality of service, delivering uniform and dependable experiences to users.

Conclusion
Raspberry Pi is a great tool for network monitoring. It’s the perfect marriage of cost, creativity and convenience. The setup is simple enough for anyone to do. Then, you put the right monitoring tools in place and configure them for the best performance. Integrated, this solution arms you with real-time visibility across your entire network to quickly identify problem areas and improve your network security posture.
Navigating dashboards on Raspberry Pi is simple and fluid. The family of monitoring solutions is varied and fits multiple needs. These attributes undoubtedly contributed to Raspberry Pi becoming a popular network administration tool among beginners and professionals alike.
Join the amazing Raspberry Pi community! Learn how to keep an expert’s eye on your network. Download the full white paper today and unlock the power of this small but mighty device to ensure your systems are always going.
Frequently Asked Questions
What is Raspberry Pi Monitoring?
Raspberry Pi network monitoring is the process of using a Raspberry Pi network monitor to track network performance and diagnose network activities. It’s a budget-friendly option for monitoring overall system performance and internet connection tools.
Why Use Raspberry Pi for Network Monitoring?
Raspberry Pi is very affordable and energy efficient, making it ideal for small-scale network monitoring jobs. Its versatility allows it to run various network monitoring tools, including a lightweight Raspberry Pi network monitor.
How Do I Set Up Raspberry Pi for Monitoring?
Set up the installation of the OS and network configuration for your Raspberry Pi network monitor, adhering to the Raspberry Pi Foundation’s instructions for a trouble-free install.
What Network Monitoring Tools Can I Install on Raspberry Pi?
You can even install network monitoring tools like Nagios or Zabbix, which serve as a lightweight Raspberry Pi network monitor, or network blockers like Pi-hole. These tools are essential for monitoring traffic, tracking network performance, and filtering out unwanted content.
How Do I Configure Network Monitoring Software on Raspberry Pi?
Configuration differs depending on the software and the specific network devices involved. In most cases, you’ll have to adjust some settings to optimize for your Raspberry Pi network monitor and track network performance. Step-by-step instructions are provided for each software application.
How Can I Access Monitoring Dashboards?
View dashboards using a web browser for your Raspberry Pi network monitor. The majority of the tools listed offer a web-based interface, ensuring your Raspberry Pi and computer connect to the same network.
What Are the Benefits of Raspberry Pi Monitoring Solutions?
They offer real-time insights, alerting, and data visualization through a lightweight Raspberry Pi network monitor. These proactive network operating solutions help manage network issues before they occur, enhancing overall operation.


Leave A Comment